Pages

Subscribe:

Labels

Showing posts with label Tips. Show all posts

Sunday, 22 May 2011

Create a FREE iTunes App Store account without a credit card

? Open the App Store on your device.

? Find a free application on the App Store.

? Important: Before proceeding to the next step, you must purchase the free application by tapping Free.
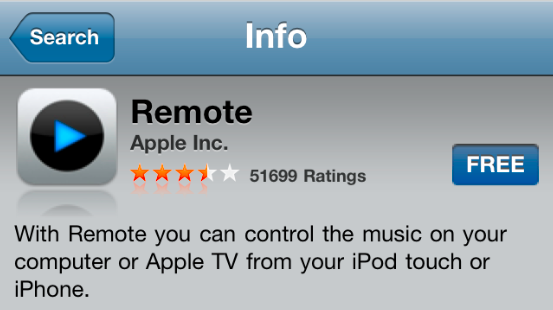


? Tap Create New Account.

? You'll need to read and agree to the iTunes Store Terms & Conditions. Tap Agree located at the bottom of the page to continue.

? Choose your country, then tap Done.
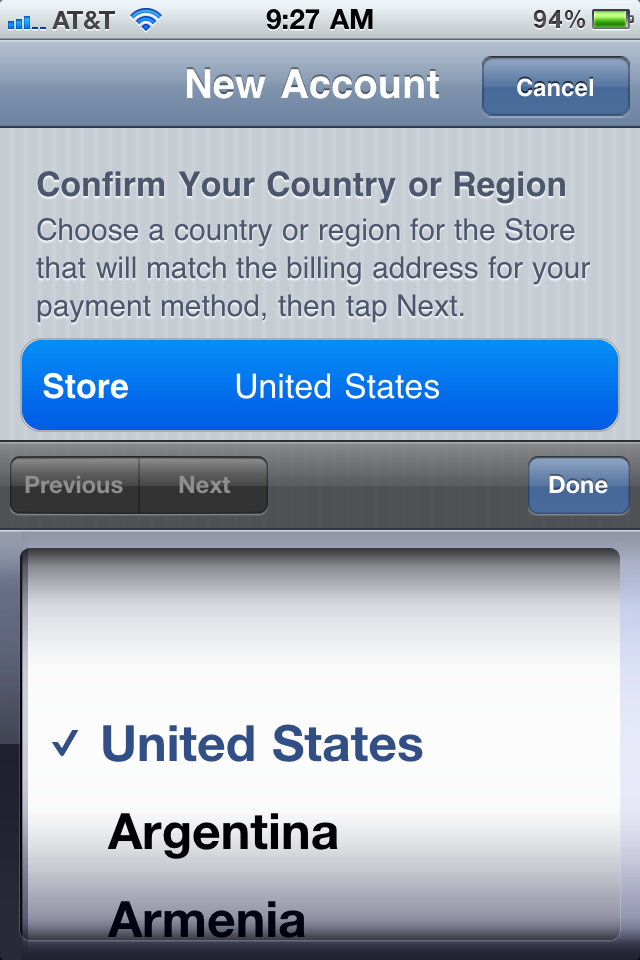


? Enter your email address, security question, birthday, and create your password. Tap Next.

? Select None as your payment option.
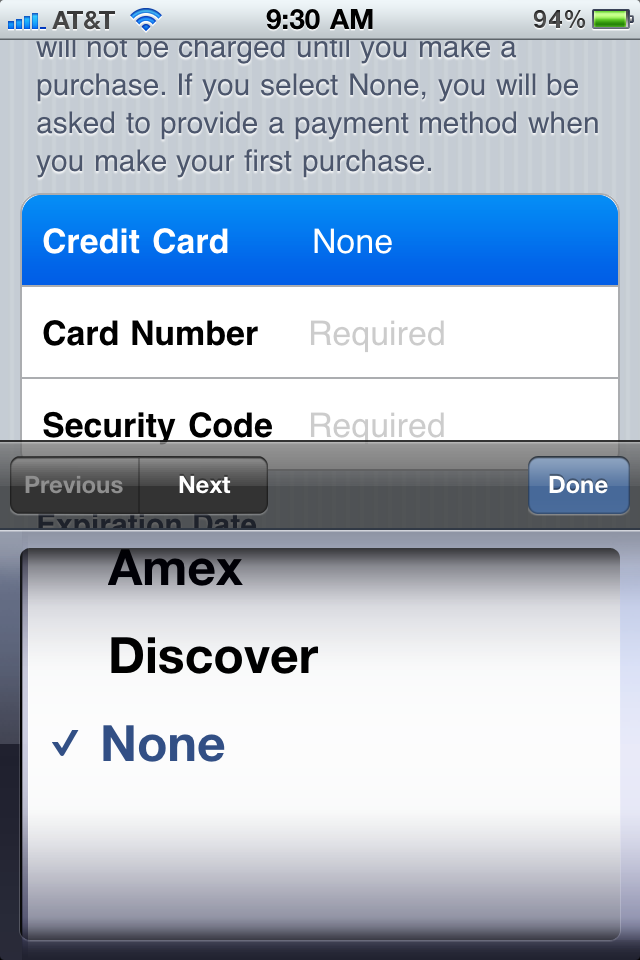


? Continue to fill out the required email, address, and phone number fields. Tap Next.

? You'll then see a screen that says "Verify your Account." Tap Done and check your email for a verification email from iTunes Store.

? Open the email and click the link enclosed in the email to activate your account.

? Once you tap the link, the App Store should automatically open and then prompt you to sign in with your account name and password.

? Tap Sign In then when prompted and then tap Use Existing Account.
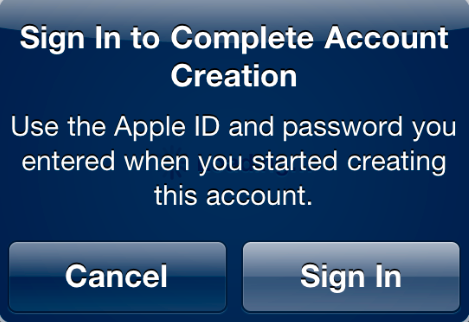

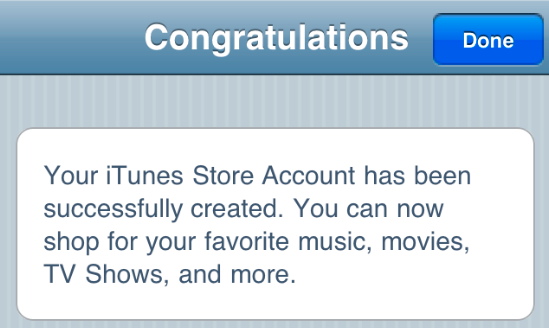
? You'll then see a Congratulations screen. Tap Done to be taken to the App Store home page.
Monday, 9 May 2011

Manage music files without iTunes


Today I have messed up my iPad ipod library. I was using MediaMonkey to transfer my music files over to my iPad. I was accidently retransferred the same songs. As a result I now see my ipod music list has duplicated entries of music file....


The worst part was, the mediamonkey does not provide me with the file deletion on my ipad. It seems that the transfer using mediamonkey is one way... WTF !!!

I looked over the internet and found this great program called CopyTrans Manager.

This program is awesome and solved my problem on the spot. And the best part is the program comes FREE.

Now I do not need itunes or stupid mediamonkey to sync my music anymore.

Why I was not using iTunes to sync my iPad?
This was because it will wipe out all my installed Jailbroken apps as I did not sync the app at the earlier stage. So it was too late for me to use iTunes now for sync purpose.

You can get a copy of CopyTrans Manager program here.

Saturday, 7 May 2011

iOS 4.3.3 Untethered Jailbreak available with Redsn0w 0.9.6rc15


This is just for jailbreak and NOT for carrier unlock for iOS 4.3.3


What's new in iOS 4.3.3?
  • Reduces the size of the cache
  • No longer backs the cache up to iTunes
  • Deletes the cache entirely when Location Services is turned off

So I will still be proud with my iOS 4.3.1 :)


What do you need to run this jailbreak?

Download Redsn0w 0.9.6rc15 for Windows
Download Redsn0w 0.9.6rc15 for Mac


iOS IPSW files for your specific device:
- iPhone4 (GSM)
- iPhone3GS
- iPad 1st Gen
- iPod Touch 4th Gen

The procedures of this iOS 4.3.3 jailbreak is similar to the previous ones I have posted before.
Please follow the detailed step HERE for running the jailbreak process.

The process is straight forward.... easy and quick.

If you are unclear about this process, drop me a comment. I will try to assist you.

Friday, 22 April 2011

4.3.2 Untethered Jailbreak Arrives Using Redsn0w 0.9.6rc14


Now support 4.3.2 iPhone4 untethered jailbreak.
Follow the steps and download here


Perhaps this youtube video guide will give us some clear steps what to do..

Tuesday, 19 April 2011

Apple iOS 4.3.2 Untethered Jailbreak Arrives Using Redsn0w 0.9.6rc13


This untethered jailbreak only supports iPhone 3GS, iPod touch 4G, iPod touch 3G and first-gen iPad. Untethered jailbreak allows the iOS device user to reboot the device anytime.

Meanwhile iPhone 4 is currently tethered and the team is hard at work to iron out the pending fix for the device.
Updated @ 22-Apr-2011: iPhone4 now untethered :-)


 At this moment, the new redsn0w tool doesn't support jailbreak for iPad 2. Both iPhone 4 and iPhone 3GS users, depending on ultrasn0w unlock to use any SIM module, will have to avoid updating their device with iOS 4.3.2 update.

Do note that redsn0w 0.9.6 RC 13 tool is available for both Mac OS X and Windows platforms.

This update contains improvements and other bug fixes including:

- Fixes an issue that occasionally caused blank or frozen video during a FaceTime call
- Fixes an issue that prevented some international users from connecting to 3G networks on iPad Wi-Fi + 3G
- Contains the latest security updates

Pre-requisites

? An iPhone 3GS or iPod Touch 4G, 3G or iPad
? iTunes 10.2.2 installed on your computer.

? Download iOS 4.3.2 on your desktop
iPhone4 (GSM) ipsw download here
iPhone 3GS ipsw download here
iPad 1st generation ipsw download here
iPod Touch 4th generation download here

?Download Redsn0w 0.9.6RC13 (Mac OS X, Windows)

Updated @ 22-Apr-2011
We have now Redsn0w 0.9.6rc14 which provide iPhone4 untethered jailbreak.

Follow the same steps as described here.

Monday, 18 April 2011

Tips: How to enable ringtones menu in iTunes

Need to assign custom iPhone ringtones? Easy....
First you need to download ringtones file which has file extension *.M4R
This website offer you loads of that.. ;-) (many many more coming soon..)

If you first install iTunes on your PC, "Ringtones" menu is not visible automatically. You need to first assign your M4R iTunes ringtone file with iTunes.
"Ringtones" menu is not visible yet under LIBRARY section as you can see below.


How to enable ringtone menu on iTunes?
You can follow below easy steps..

Step 1:
Right-click on the m4r file and assign it ("open with") with iTunes.
Your iTunes will then opened and start playing the ringtone.


Step 2:
The selected m4r file now appeared on iTunes.


Step 3:
You are ready to sync your iPhone with your new custom ringtones.

That's all folks.

Monday, 11 April 2011

Tips: How to create custom iPhone SMS tones


Boring with the default iPhone SMS tones? Want to use a new one? wait no more...

This time I wanted to share how to convert mp3 file into iPhone SMS tone.
I am using iTunes 10 (v.10.2.1.1). You need to jailbreak your iPhone to use this tips.

Step 1: Trim your MP3 file
Choose your preferred MP3 file. Put it in iTunes playlist.
Trim that song to any section within 10 sec max. (You do not want your sms tone to ring too long)

? On iTunes, right-click the MP3 file and select "Get Info".
? Go to Option tab.
? Select your start time and end time of your new SMS tone.
? Click OK

Step 2: Convert trimmed file to AIFF format
? Right-click on the song again
? Select "Create AIFF version"
? After conversion completed (within few seconds), go to your iTunes media folder in your PC (e.g. C:\Users\<your_pc_name>\Music\iTunes\iTunes Media\Music)
? Look for correct artist folder
? Your new AIFF file is located there somewhere
? Rename the file extension from aif to caf

Step 3: Rename the AIF file
Rename the AIF file to any one of list below;
sms-received2.caf
sms-received3.caf
sms-received4.caf
sms-received5.caf
sms-received6.caf

? Never replace the sms-received1.caf file
? Never add more than 6 SMS file e.g. sms-received7.caf

? Always backup your original SMS tones just in case

Step 4: Transfer the newly created caf file to iPhone
? Use WinSCP to transfer the file to iPhone. (You need to install OpenSSH on iPhone)
? Put and replace the file in iPhone folder: /System/Library/Audio/UISounds

Step 5: Reboot your iPhone
? Reboot the iPhone after file transfer completed

That's it. You are done.
Now choose the new SMS tone. Remember the name of the tones remain the same. Ignore it.


ENJOY !!

Check this out my sample SMS tone.
Michael Jackson - smile;
http://hotfile.com/dl/114088550/fefe56c/michael_jackson_-_smile_-_sms-received3.caf.html
Nintendo mario sound;
http://hotfile.com/dl/114088628/28c43ff/nintendo_-_sms-received2.caf.html

Saturday, 9 April 2011

Tips: Create iPhone custom ringtones

In this guideline I will give you step-by-step guide to create free custom ringtones for your iPhone using iTunes.
To make a free ringtone all you need is an m4a file, which is DRM free and not more than 30 seconds, rename it to m4r and add it to iTunes.


The first time you install iTunes, you will not see "Ringtones" section as shown in screen shot below.
How to bring it up? easy... just double-click an m4r file from your PC windows explorer. Make sure it is associated to be opened with iTunes.

Follow these steps below to create your own custom ringtones;

Step 1: In iTunes, right click on the song (any mp3 files) you are going to make into a ringer and select “Get Info”


Step 2: Go to the options tab and go down to the “Start Time” and “Stop Time” check boxes. Check both boxes and input the time you want your ringtone to start/stop (it should not be more than 30 seconds). Click OK when you’re done.

Step 3: Right click on your newly “clipped” song and select “Create AAC version” The song will be re-encoded using the start and stop times determined (If your menu item does not read “Create AAC version” and reads “Convert Selection to MP3? (or some other format) please go to iTunes > Preferences > Advanced > Importing and change the “Import Using” drop down menu to “AAC Encoder”).

Step 4: After the song is done encoding navigate to your iTunes Music folder (e.g. C:\Users\\Music\iTunes\iTunes Media\Music), locate your song, and drag it to your desktop. After the song is on your desktop go back to iTunes and delete the clipped version from you iTunes library (It won’t delete it from your desktop, it will only remove it from iTunes).

Step 5: Go back the song on your desktop and right click on your song and choose “Get info” (for MAC OS). Go to the name and extension section and change the extension from .m4a to .m4r (or you can just change the extension right from your desktop)

Step 6: After the extension is changed simply double click on the file to add it to your iTunes library. It should show up under the ringtones section. Then sync your phone with iTunes.

Step 7: You should now be able to change the ringtone to the new one by going to Settings –> Sounds –> Ringtone. The new ringtone should show up under “Custom”. Tap on it to set it as your default ringtone.

That’s all folks.

Download sample ringtones here:
Jason Derulo - whatcha say
http://hotfile.com/dl/113883006/5fed898/Jason_Derulo_-_Whatcha_Say.m4r.html

Tips: Backup and Sync iPhone contacts with Gmail account

You will never lose your contact ever again even though you lost your iPhone.

Each time you have a new entry in your iPhone contact, it will be sync automatically to your Gmail account contact. This is what so beautiful about this service. Sync is done immediately and automatically and you do not need to worry when to run your contact sync.
Additionally, you can update (add/modify/delete) your contacts directly on your PC (login to Gmail contact) and get it sync automatically on your iPhone. I love this feature :-)

Of course you do need to have a free Gmail account first and an iPhone :-)

Follow these simple steps below.

1/ Go to your iPhone settings, then click the "Mail, Contacts, Calenders"


2/ Then click "Add Account"

3/ Choose EXCHANGE

4/ Key in your information;
e.g.
Email:          <put your full gmail address including @gmail.com>

Domain:       <leave blank>
Username:    <put your full gmail address including @gmail.com>
Password:     <your_password>
Description:  <anything you like to represent this account>


Then click NEXT.
Now you will see additional "Server" field.
put m.google.com in Server field.
Then click "Next"

5/ After successful account verification, you will be presented with 3 options below to sync between your Gmail account and iPhone.


I choose to have all 3 options turned ON. Every time I update my Calendars and Contacts on iPhone, it will be immediately sync with my Gmail account automatically (vice versa). My emails on my Gmail account is also sync on my iPhone mail client. Pretty neat.

Tips: Do the same configuration on your iPad (if you have one) to get its contacts sync as well.

Tuesday, 5 April 2011

Apple IOS 4.3.1 Unthethered Jailbreak - How to...


IOS 4.3.1 unthethered jailbreak has just been released today.
NOTE: Users who rely on ultrasn0w unlock MUST stay away from Redsn0w.

This jailbreak supports all devices except ipad2.

What you need to have to jailbreak;

1. iTunes 10.2.1 installed on your PC

2. IOS 4.3.1 IPSW saved on your computer.
Download links below for iPhone4 firmware;
iPhone4 IPSW file

Download links below for iPad 1 firmware;
iPad1 IPSW file

3. Redsn0w 0.9.6rc9 package. Download link below;
Download Redsn0w here


Please follow these steps exactly one-by-one;


STEP1:
Update your IOS to 4.3.1 using iTunes.
Shift + left click the RESTORE button from iTunes after connecting your iPhone.
Select the IOS 4.3.1 IPSW in your PC which you have just downloaded.
Let the update completed.


STEP2:
Now run the redsnow.


Click BROWSE button.
Select the same IOS 4.3.1 IPSW again here.


Now simply select “Install Cydia” and click “Next”.


Now make sure your device is both OFF and PLUGGED IN to the computer before you click “Next”.


At this stage you will be presented with a screen where you will be guided on how to enter DFU mode. Quickly hold “Power” button and then while holding the “Power” button, you will now have to hold “Home” button too. Now after few seconds release “Power” button but keep holding “Home” button until installation begins.


Wait shortly. Once done, your iPhone will restart automatically and you will find it fully jailbroken (untethered) on the latest iOS 4.3.1 firmware.

That's it folks. You are done. Congratulations !! Enjoy the free iphone apps on this website !!